Equipment Description
The FLPS (Flow Level Pressure System) consists of a portable rack with a main control panel and data logger, various flow meters, level & pressure instruments, piping, tanks and circulation pump. There are two large collecting tanks found below the cart. Two are needed depending on the orientation we are working in. During this experiment, we will manipulate the opening & closing of valves to achieve a certain orientation of flow. This is done to see any changes in the system when there is flow through specific equipment.
This lab is conducted in WB25A (Fluid Mechanics room), where other fluid mechanics experiments will be conducted, so make sure to be wary of other experiments.
Background & Theory
To review concepts behind the leaching process, click here.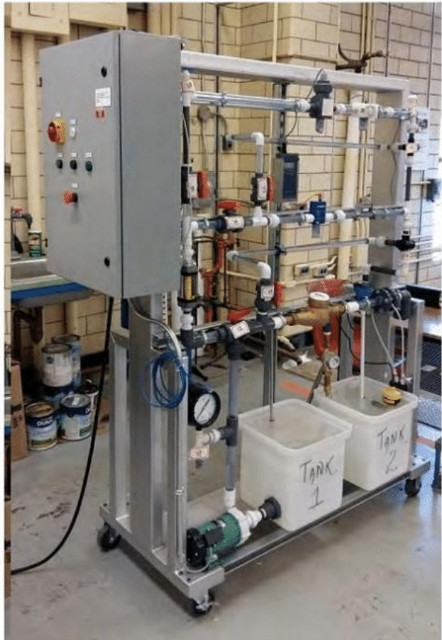
Virtual tour of the operation unit
ZOOM IN AND OUT TO SEE THE CLOSER LOOK OF THE OPERATION UNIT. YOU CAN ALSO SELECT ANY OF THE FOLLOWING CLOSE-UP TOUR TO SEE VALVES AND MEASUREMENT DEVICES ON THE UNIT.
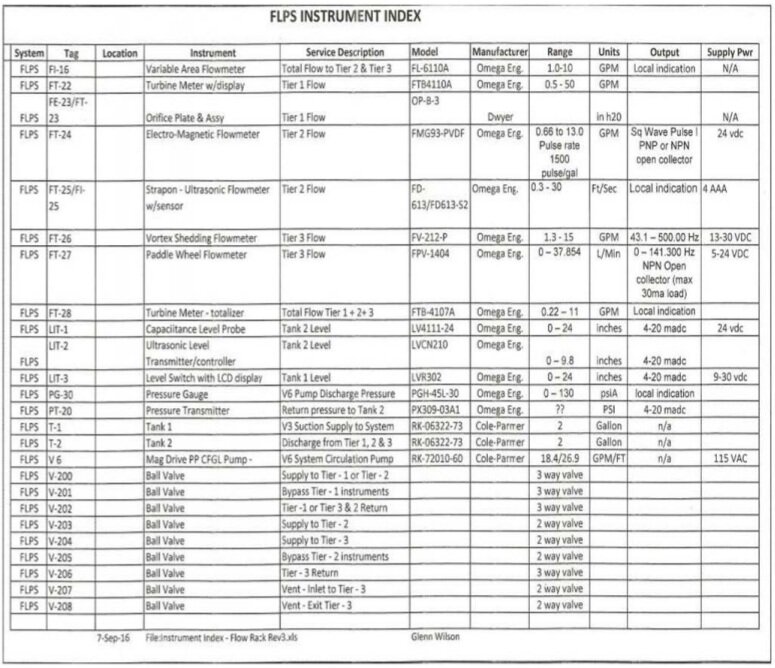
Piping and Instrumentation Diagram
Gallery

![]()

![]()

![]()


![]()
STANDARD OPERATION PROCEDURE
Section A: Start-up
Startup Checklist
-
Flow cart is plugged to power source
-
Power box is closed
-
If it is open, use a flathead screwdriver to close the power box (Figure 5)
-
The main power switch is at ‘off’ position
-
No USB is plugged in the grey cable located at the top left hand side of the power box (Figure 8)
-
There is water in Tank 1 and Tank 2
Procedure
-
Plug the power cable into the power source.
2. If the power box is open, use a flathead screwdriver to close the power box
3. Set the valves to the correct position based on orientation assigned to your group.
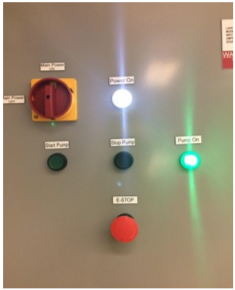
4. Turn the main switch to ‘on’ position. The POWER ON light will flash white to indicate that the power is on.
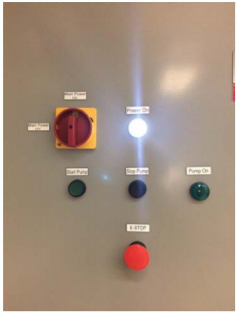
5. Start PUMP -V6 by pressing the green button. Note: The green light will indicate that the pump is on and running
Section B: Shutdown
1. Press STOP PUMP. The green light should turn off.
2. Attach USB to the cable located near top of the power box. NOTE: Do not insert your own personal Flash Drive. Only use the specific one provided by your TA.

3. Observe the green lamp near the cable turns green and stays green while data is copied
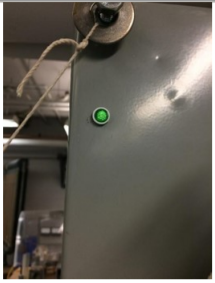
4. Wait until green LED lamp goes out. Then remove Flash Drive. Note: The green lamp stays lit for a bit longer than it takes to copy the data, but please be patient and wait for it to go out before removing the Flash Drive or the data file may be corrupted or incomplete.
5. After the data is retrieved, turn the main switch to OFF. The POWER ON light should turn off as well.
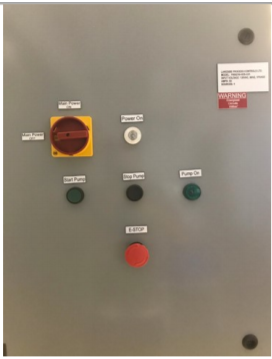
6. Unplug the cable from the power source
Shutdown Checklist
-
Flow cart is unplugged
-
Power box is closed
-
If it is open, use a flathead screwdriver to close the power box (Figure 5)
-
-
The main power switch is at ‘off’ position
-
No USB is plugged in the grey cable located at the top left hand side of the power box (Figure 8)
-
There is water in Tank 1 and Tank 2