Equipment Description
Three columns of around the same height will be used – around 1.40m – each filled with different fluids. The water column has a height of 1.448m; the 0.05% carbopol column has a height of 1.372m; the 10% glycerin solution column has a height of 1.344m. Another column, found at the top floor, is filled with water and has a height of 4.763m.
The objects you will be using in this have 4 distinct shapes: sphere, cube, cone, and a square-based pyramid. The size of each shape is simply into different sizes, either big or small. Finally, two different materials are used to create the shape, either clear glass or white, opaque plastic.
Background & Theory
To review concepts behind the leaching process, click here.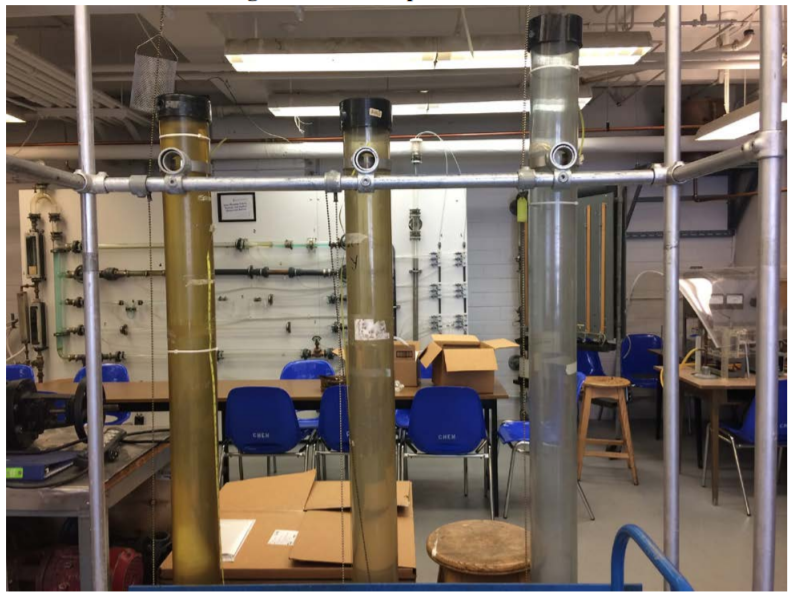
Click the image to download the SOP.
Virtual tour of the operation unit
ZOOM IN AND OUT TO SEE THE CLOSER LOOK OF THE OPERATION UNIT. YOU CAN ALSO SELECT ANY OF THE FOLLOWING CLOSE-UP TOUR TO SEE VALVES AND MEASUREMENT DEVICES ON THE UNIT.
2D Images of Lab Equipment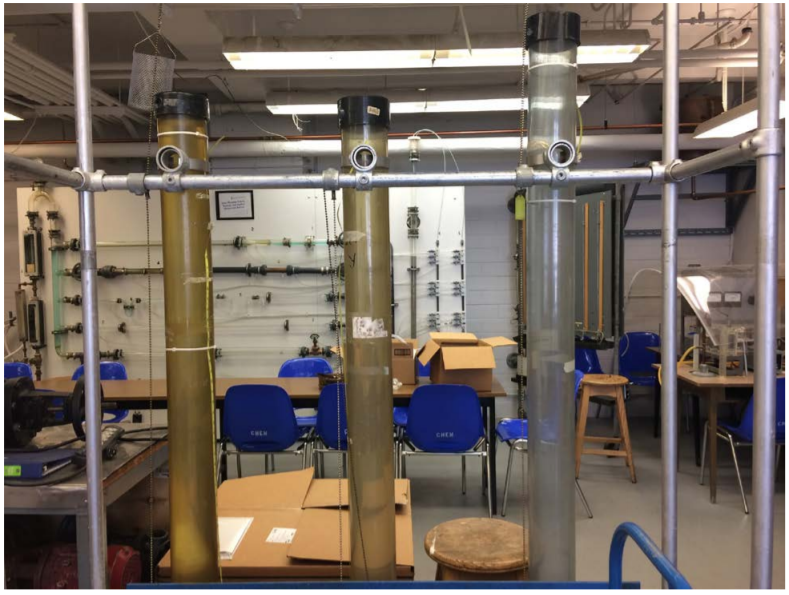
Where the experiment will mainly be conducted where objects can be dropped into each column to examine the drag effects the object experiences. From left to right: Water. Carbopol, Glycol.
In this drawer, you can find all the sorts of objects you can drop into each column. Each object in each bin is different by shape, size, or material.
Startup Checklist:
-
Make sure every column is already filled; each column with water, carbopol, glycol
-
Make sure all the necessary objects needed for your analysis have been selected
-
Read the questions at the end of the SOP to see what variables will be analysed
-
-
Make sure the wire-meshed basket can be found for each column
-
There is a bucket beneath each column
Equipment List:
-
Objects needed for analysis (varying in size, shape, and density)
-
Columns filled with fluids
-
Stopwatch
Safety Considerations:
-
Wear all necessary PPE (gloves, goggles, lab coats)
-
Clean any spills and notify a TA
-
Make sure the basket is in the column before dropping an object
Experimental Procedure:
-
Collect objects that will be used in the experiment.
2. Dip the wire-meshed basket into the column, if not already done so.
3. Drop the object into the column. Start the timer.
4. When the object reaches the meshed basket, stop the timer, record the time and object shape.
5. Pull the meshed basket out of the column and retrieve the object.
6. Repeat steps 1 through 5 for each desired object in each solution
Heavier Objects Section:
For heavier objects, we would need to move on to a larger, longer column. The procedure is still exactly the same, just moved on to a bigger column. The videos below will show the procedure for working on the larger column:
Shut Down Checklist
-
Remove the meshed basket from each column
-
Clean and dry the objects used, and place them back where they were found
-
Make sure to drain the large column